


My Detailed Camping Guide to RIAT
Get ready to dive into my RIAT adventure! From my very first camping trip in 2014 to my final setup in 2025, I’m excited to share everything I’ve learned. I’ll walk you through the essential gear for beginners, break down the costs of an unforgettable trip, and highlight the best camping spots. I’ll also cover how to deal with the weather and what food works best, so you can enjoy the ultimate RIAT experience
Where do I stay for RIAT?
One of the highlights of my year is staying at the incredible Townsend Farm, also known to many as Fairford Airshow Camping. Over time, this little patch of countryside has become more than just a place to pitch a tent, it's a core part of my RIAT (Royal International Air Tattoo) experience for me.
These days, I make the most of it by arriving Monday and staying through to the following Monday. It gives me the full week to soak up the atmosphere, enjoy the build-up, and, of course, catch every moment of the show without feeling rushed.
After a few years of trial and error, I've learned a lot about what works and what doesn’t when it comes to camping for RIAT. Each year, I keep a list, what I used, what I didn’t, and what I wish I’d had with me. It’s become a bit of a tradition and has helped me build a setup that’s both practical and comfortable.
Let’s face it, RIAT can be an expensive trip, especially once you factor in tickets, travel, and gear. So, I set myself a bit of a challenge: to keep costs down by sourcing second-hand equipment. Platforms like eBay, Vinted, and Gumtree have been absolute game-changers. You’d be amazed at what you can find if you’re patient and know what you’re looking for.
One of my best finds came in 2024, when I was browsing my local antique and collectibles shop in Battlesbridge. I popped into a quirky little spot called The Tool Shed and, to my surprise, I found a three-way gas fridge, the exact kind I’d been planning to buy new for around £300. A steal at just £20. It works like a charm and has saved me a fortune.
So, what’s the real advice here?
It’s simple: Plan ahead. Make a list. Learn from experience. And don’t be afraid to get creative when it comes to gear. Whether you’re a first-timer or a seasoned RIAT camper, there’s always room to tweak your setup and save a few quid along the way.
Stay tuned, next up, I’ll be sharing my full 2024 gear list, including the must-haves, the nice-to-haves, and what I’ll be changing for next year!

The Detailed Camping Guide
Building Your Base Camp
Setting up your pitch properly can make a huge difference to your RIAT camping experience. Using our own experience, we’ll show you how to create a clean, organised and efficient setup, helping make your stay more comfortable and your RIAT week run that little bit smoother.
Planning your food properly can make camping at RIAT much easier. We’ll cover simple cooking setups, food storage, meal ideas and campsite options, helping you stay well fed without making things more complicated than they need to be.
Camping on a Budget
Camping on a Budget
Camping at RIAT doesn’t have to cost a fortune. We’ll share ways to save money on tents, sleeping gear, cooking equipment and other essentials, including where to buy second-hand and which items are really worth spending a little more on.
Tools, Spares & Repairs
A few basic tools and spare parts can save a lot of hassle at your campsite. We’ll cover tent repair kits, spare pegs, mallets, cable ties, tape and useful tools, helping you deal with those little problems before they become bigger ones.
"When it comes to camping, everyone has their own idea of what gear is essential. Some people swear by minimalism, while others believe in bringing absolutely everything "just in case." But RIAT (The Royal International Air Tattoo) is a different kind of camping experience, one that has taught me a lot about what truly makes a comfortable and practical setup. Over the years, I’ve learned the hard way, refined my choices, and ended up with a setup that works perfectly for our party."
Building your Base Camp
First things first, you need to create a pitch for your tent, some sites thed pitches are already given to you, for example some campsites are 8x8m, 5x8m or 8x10m. So your have to plan how much room you need and what you will need to bring, where as Fairford Air Show Camping, your don't have any restrictions, so you have more freedom, That why we like staying there, plus we have a large group, which works out perfect for us and many others.
Below are some examples of layout designs and what you will need, and might want to take.
Start by Planning a Setup That Works for You
The first thing I would do is plan a setup that works for you and your family. Think about how many people are camping, how much equipment you’re bringing, how many cars you have and how much space you realistically need.
If you’re camping as part of a larger group and you’re not restricted to a set pitch size, I personally recommend looking at Fairford Airshow Camping, as the more flexible setup can work really well for bigger groups. I’ll show you an example of how I would organise a larger group pitch later in this guide.
Also think carefully about where you park your car. Try to keep a dedicated space for it from the beginning, otherwise your camping setup can slowly spread into that space. You also want to make sure you can get the car out easily if you need to visit the shops, leave during the week or head home early.
Before putting the tent up, have a good look around your pitch. Check any campsite spacing rules, including keeping a suitable distance from neighbouring tents.
Then think about the things that are easy to overlook: Are you underneath tall trees? Are you at the bottom of a slope where rainwater could collect? Are you too close to the toilets, bins or busy walkways?
These little decisions can make a huge difference. Spending an extra few minutes planning the pitch before you start unloading everything can help you create a setup that is safer, more comfortable, easier to use and much better for the whole week.

Look at the Ground
The first thing I normally look for is reasonably flat ground.
A very small slope isn’t normally a problem, but you probably don’t want to spend five or six nights slowly sliding down your bed.
If the ground does slope slightly, I would normally try to position the tent so your head is slightly higher than your feet.
Also have a look for:
-
Holes or dips
-
Very uneven ground
-
Large stones
-
Areas that already look particularly wet
-
Long grass or hidden objects
-
Ground directly underneath large trees
If heavy rain is forecast, I would also think about where water is likely to run.
A pitch at the bottom of a noticeable slope might look perfect when you arrive in sunshine, but it could become a very different campsite after a night of heavy rain.
Think About Your View
This is something I think is especially important when camping around RIAT.
Before putting the tent up, think about where you want the door or main windows facing.
If you are staying somewhere with aircraft arriving or departing nearby, having the main entrance facing towards the flying activity can make a massive difference.
There is nothing better than sitting in your tent doorway or under the awning with a coffee while aircraft are arriving overhead.
I’ve also seen people deliberately position their tents sideways so the main living area or gazebo faces the runway rather than the tent door.
Both can work.
I would just spend five minutes working out your preferred view before hammering the first peg into the ground.

Think About How Much Space You Actually Need
Your pitch size will depend on where you are staying.
Some campsites give you a defined pitch, while others may give you more flexibility about where and how you set up.
If you have a fixed pitch, work backwards from the available space.
Think about:
-
Your tent
-
Guy lines
-
Gazebo or awning
-
Windbreaks
-
Chairs
-
Cooking area
-
Vehicle
-
Storage
-
Walking space
You don’t want everything squeezed together.
It is surprising how much room guy lines and windbreaks take once everything is actually assembled.
If you have more freedom with your pitch, I would still avoid spreading yourself across a huge area unnecessarily.
Leave enough room for other campers and make sure vehicles can still move safely around the campsite.
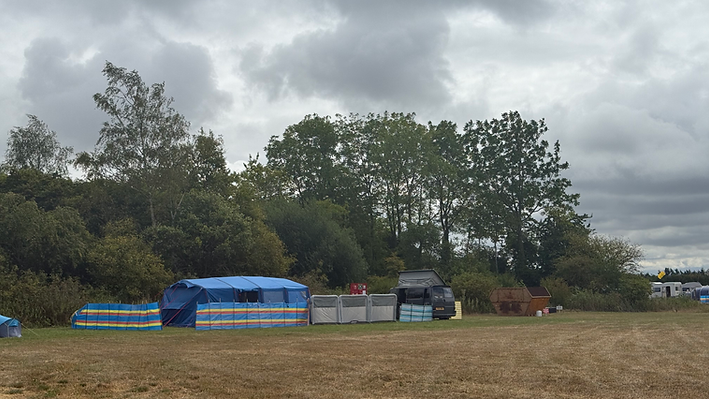
Setting Up the Tent
Once I’m happy with the location, I would normally start with the tent before doing anything else.
Your tent effectively becomes the anchor point for everything around it.
Step 1: Lay the Tent Out
Take the tent out of the bag and lay it roughly where you want it.
Before assembling anything, stand back and look at it.
Check:
-
Which direction the door faces
-
Where the bedrooms will be
-
How far the guy lines will extend
-
Where the awning or gazebo will go
-
Where your vehicle will sit
It is much easier to rotate a tent while it is lying flat than after you have spent half an hour putting it up.
Step 2: Assemble the Main Structure
Follow the instructions for your particular tent rather than trying to rush it.
For pole tents, I normally like to lay everything out first so I can see which poles belong where.
With an inflatable tent, make sure the tent is positioned correctly before you start pumping it up.
If several people are helping, I find it works better when one person takes the lead rather than everyone pulling different parts of the tent in different directions.
Step 3: Peg the Tent Properly
Don’t assume that because the weather is calm when you arrive it will stay like that.
RIAT week can give you sunshine, wind and heavy rain surprisingly quickly.
I would always peg the tent properly from the beginning.
Use a decent mallet and make sure the pegs are secure.
I also normally take spare pegs because they are one of those little things that seem to disappear when you need them most.
If the supplied tent pegs look particularly lightweight, upgrading to stronger pegs can also be worthwhile.
Step 4: Use the Guy Lines
I know guy lines can be annoying when you are walking around the campsite, but they are there for a reason, Use them.
They help support the tent when the wind starts picking up.
I would also try to keep them organised and visible so you aren’t constantly tripping over them at night.
Bright guy lines or small marker lights can help, especially around busy family pitches.
Adding an Awning, Gazebo or Event Shelter
For longer RIAT stays, this is probably one of the things I would recommend most.
Having somewhere covered outside the tent completely changes your camping setup.
Instead of everyone being stuck inside the tent when it rains, you still have somewhere to sit, eat and relax.
It also gives you shade if we happen to get one of those very hot RIAT weekends.
Where I Would Position the Awning
If your tent has a built-in porch or connecting awning, the decision is fairly easy.
For a separate gazebo or event shelter, I normally like it positioned close enough to the tent that you can move between them easily.
However, I wouldn’t cram everything together.
Leave yourself enough space to walk around safely and check that the tent's guy lines aren't running through the middle of your seating area.
I’ve seen some really good setups where people create a small courtyard:
Tent → sheltered seating area → windbreaks around the outside.
It works really well.
You get privacy, shelter and a central area where everyone can sit together.

My Practical Guide to Building a Comfortable Base Camp
Secure Your Gazebo Properly
One thing I would definitely avoid is putting up a gazebo and assuming the weight of the frame will keep it there.
It probably won’t.
Even fairly moderate wind can move a lightweight gazebo surprisingly easily.
I would always secure it using suitable pegs, guy ropes and any recommended anchoring system.
If strong winds are forecast, I would consider removing the canopy rather than risking damage.
I’ve seen plenty of campers lower their gazebos overnight when poor weather is expected.
It only takes a few minutes and can potentially save your shelter.
Create Different Areas
If you are camping for several days, I think separating your pitch into little areas makes everything much easier.
For example:
Sleeping area
Your main tent and beds.
Living area
Gazebo, table and chairs.
Cooking area
Camping stove, food preparation and cool boxes.
Storage area
Bags, spare clothing, photography equipment and camping equipment.
It sounds slightly over-organised, but once you have several people camping together it makes a massive difference.
Otherwise everything slowly migrates into one giant pile in the middle of the tent.
Windbreaks Are Brilliant for Creating a Pitch
Windbreaks are probably one of the simplest things you can add to make a campsite feel much more organised.
They obviously give you some protection from the wind, but I mainly like them because they help create a boundary around your camp.
I’ve seen people create small entrances using the windbreaks, almost like a driveway into their pitch.
For families, it can also make the camping area feel much more contained.
Just remember not to completely block access routes or create something that prevents people moving safely around the campsite.
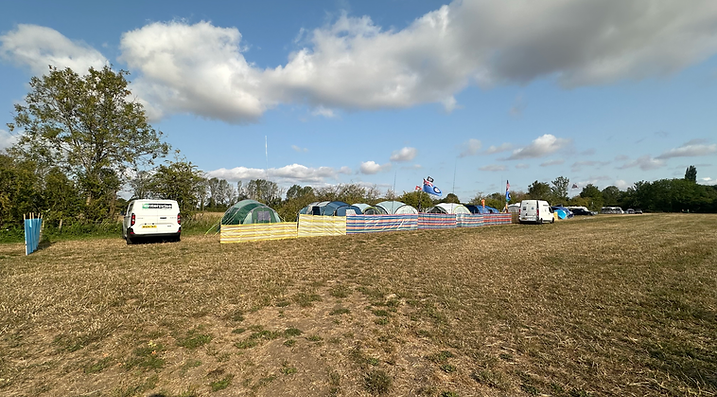
Top Tip: If you can, place a windbreak between your tent and your neighbour’s. This not only gives you a bit more privacy but also creates a handy driveway or parking space, especially useful when the campsite gets busy. See the sections below for an example.

Create a comfortable area to unwind, while also giving kids plenty of space to move around safely within your tent setup.
Examples of Set Ups
Not sure how to set up your pitch, below if information and ideas on layouts and effeient ways of camping
.png)
Example Setup for a Family or Small Group
If you’re coming as a family or a small group, a setup like this could work really well.
One of the biggest changes we’ve made to our own camping setup over the years was buying an Event Shelter. We now use this as our main kitchen and social area, and it has made camping much easier. It gives you more space to organise cooking equipment, food, tables and chairs, while also giving you somewhere sheltered if the weather turns.
The image above is AI-generated, but I’ve used it as a reference because it is very similar to the type of setup we have used ourselves. It gives you a good idea of how you could arrange the tent, Event Shelter, car, seating area and other equipment without everything feeling crammed together.
This type of setup works best if you’re not restricted to a fixed pitch size. If your campsite gives you a set pitch, you’ll need to adjust the layout to suit the space available. I would always work out your tent and shelter sizes before you arrive, then leave enough room for guy lines, your car and a safe amount of space around neighbouring pitches.
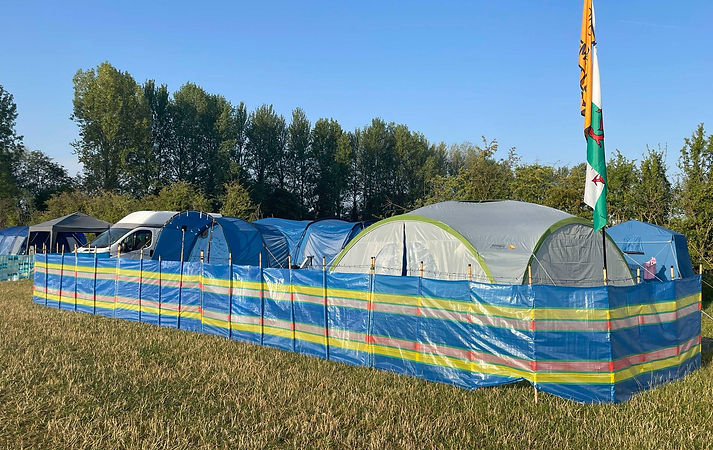
This was part of our groups set up a few year ago, giving your a real work look to how we pitched up. The windbreaks help with privacy and works great if you have children, or bring pets with you.

This was my first set up when I attended on my own. I had many learning curves, from forgotten equipment, lack of planning and research. Also a great basic set up for 2 people.
Below are some ways of creating a pitch by the amount of people in your party, giving you an idea on what and how much to bring.
My Suggested Setup for Two People
For a couple or two friends, I wouldn't go too complicated.
A 4-berth tent is normally a really good size.
Although it says four people, once you've got two beds, bags, boots, coats and camera equipment inside, the space disappears very quickly.
If I was staying for five days or more, I would actually consider a 6-berth tent for two people.
That might sound excessive, but the extra space is brilliant when the weather changes.
I would probably add:
-
A small gazebo or porch awning
-
Two camping chairs
-
Around 4–6 windbreak panels
-
Two raised camping beds
-
Sleeping bags
-
A decent mallet
-
Spare pegs
It gives you everything you really need without bringing half of your house with you.
My Suggested Setup for Four People
For four people, I would start looking at a 6–8 berth tent.
That should give you enough room to sleep comfortably while still having somewhere for bags and equipment.
I would also definitely consider one gazebo or event shelter.
This becomes your shared living area.
You can use it for:
-
Breakfast
-
Cooking
-
Sitting together
-
Watching aircraft
-
Getting out of the rain
-
Getting away from the sun
For windbreaks, around 6–8 panels normally gives you enough flexibility to create a decent sheltered area.
I would also bring at least two torches or headlamps.
Walking around a campsite after dark while trying to use the light from your phone isn't something I particularly recommend.
My Suggested Setup for Six People
Once you get to around six people, I think having separate areas becomes much more useful.
You could use:
-
One large 8-berth tent
or
-
Two 4–6 berth tents
Personally, I quite like the two-tent option for groups.
It gives people a bit more privacy and you're not waking six people every time somebody needs the toilet during the night.
For our sort of group setup, two gazebos or event shelters works really well.
One can become the kitchen and eating area.
The other becomes the main social area.
We've used this kind of setup ourselves and I find it works brilliantly, especially when you're staying for quite a few days.
Add around 8–10 windbreak panels and you can start creating a really comfortable little base camp.
I would also bring a tent repair kit, spare pegs and some spare guy lines.
You may never need them.
But when you do need them, you'll be very glad they're sitting in the car.
My Suggested Setup for Eight People
With eight people you are getting into what I would call a proper RIAT base camp.
I would probably use either:
-
One large 8+ berth tent with another smaller tent
or
-
Two reasonably large family tents
Splitting families or couples between tents can work much better than trying to squeeze everyone into one enormous tent.
For communal space, two or three shelters can work really well.
For example:
Shelter 1: Kitchen
Shelter 2: Main seating and dining area
Shelter 3: Storage, extra seating or wet-weather space
You certainly don't have to bring three, but if you have the vehicle space and you're staying for a long period, having extra sheltered space is surprisingly useful.
Around 10–12 windbreak panels should give you plenty of flexibility around a setup this size.
Large Groups of 10–12 People
This is very similar to how many larger RIAT groups camp.
At this point, I wouldn't really think about it as one tent anymore.
Think of it as building a small campsite within the campsite.
You might have:
-
One large 8+ berth tent
-
One or two smaller tents
-
One-Two gazebos or event shelters
-
A dedicated cooking area
-
A main social area
-
Equipment storage
-
Cars positioned around the outside
-
Windbreaks creating the boundary
For large groups, having different tents also helps with sleeping arrangements.
Someone who wants an early night doesn't necessarily want to share a tent with someone sitting outside chatting until midnight.
For a group this size I would definitely bring multiple mallets as well.
Watching ten people stand around while one person hammers 40 pegs into the ground isn't the quickest way to start your holiday.
Give a couple of people a mallet and the campsite goes up much faster.
Don't Forget Your Sleeping Setup
You can build the best-looking campsite at RIAT, but if you sleep badly every night you're probably not going to enjoy it very much.
Where possible, I prefer sleeping on a raised camping bed rather than directly on an airbed on the ground.
Being raised slightly can make the tent feel warmer and it is much easier getting in and out of bed after spending all day walking around the showground.
It also gives you some useful storage space underneath.
Even during summer I would still bring a proper sleeping bag.
RIAT can give you a very warm afternoon followed by a surprisingly cold night.
A blanket or extra layer doesn't take up much room either.
A Few Things I Always Like Having Nearby
Once the main campsite is built, I normally keep a small collection of useful things somewhere easy to reach.
Things like:
-
Spare tent pegs
-
Spare guy lines
-
Duct tape
-
Tent repair patches
-
Cable ties
-
Torch
-
Headlamp
-
Spare batteries
-
Mallet
-
Bin bags
None of them are particularly exciting, but they are exactly the sort of things that solve problems when something breaks.
Duct tape and cable ties have probably rescued more camping trips than some expensive pieces of camping equipment.
Don't Try to Build Everything Immediately
If you've just arrived after a long drive, it can be tempting to unload everything at once.
Personally, I would get the important things sorted first.
My order would normally be:
1. Choose the pitch
2. Position the tent
3. Put the tent up
4. Peg and secure everything properly
5. Put up the gazebo or awning
6. Add the windbreaks
7. Set up the beds
8. Create your seating and cooking areas
9. Unpack the smaller equipment
That way, if the weather suddenly changes, you've already got somewhere dry to put everything.
My Biggest RIAT Camping Advice
Try not to copy somebody else's campsite exactly.
I've seen some brilliant setups at RIAT, but what works for a family of twelve staying for ten days probably isn't what two people staying for three nights need.
Use other people's setups for ideas.
Look at how they position their tents.
Look at where they put the gazebos.
Look at how they use windbreaks.
Then take the bits that would work for you.
For me, the best RIAT campsite isn't necessarily the biggest or the one with the most equipment.
It's the one where you can come back after a long day at the airshow, sit down with something to eat or drink, watch a few aircraft going over and actually feel comfortable.
That's when you've built a good RIAT base camp.

This was our set up in 2025, this was based on 12 people, given you space and room to cook, socialise and sleep with out being in each others pocket.
Lay Out Ideas( Kitchen)

A simple kitchen layout, perfect is your staying longer than 3 days.

Adding plenty of lighting gives the space a cool, colourful look while also improving visibility at nigh

RIAT Camp Kitchen Guide
Perfect for a large group or campers who are staying for 4 days or more
A well-planned kitchen setup can make your RIAT camping experience smoother, more enjoyable, and far more comfortable, especially if you're staying for several days. Use this guide to help plan your own camp kitchen, whether you're cooking for a small group or a large family.
Setting Up Your Kitchen Area
Most RIAT campers set up their kitchen under a gazebo or event shelter to protect from sun, wind, and rain. This creates a dedicated space for cooking, storage, and gathering.
Recommended Shelter
-
Gazebo / Event Shelter
-
Provides shade and weather protection
-
Creates a central hub for cooking and socialising
-
Workspaces & Surfaces
A good camp kitchen needs plenty of stable surfaces for prepping food, cooking, and storing equipment.
-
Fold-up tables: Ideal for food prep, serving, and even games in downtime
-
Tall folding tables: Great for storing food, placing appliances, and organising gear
-
Fold-up sink unit: Makes dishwashing easy and keeps the campsite tidy
Storage & Organisation
Keeping your kitchen organised saves time and reduces mess.
-
Food & cooking storage cupboards: Store non-perishables, utensils, and cookware
-
Cool boxes: Keep drinks and snacks cool
-
Gas fridge: Reliable cooling for long stays
-
Water containers: Essential for cooking, drinking, and washing
Tip: Label shelves or cupboards to keep things easy to find—especially helpful in large groups.
Cooking Equipment
Your cooking setup depends on your group size and meal plans. For a full-service RIAT camp kitchen, consider:
-
Gas cookers (1–3 units): Primary cooking stations
-
Jetboil: Fast boiling for drinks or quick meals
-
Gas kettle: Ideal for morning brews and late-night teas
-
Cooking pots & pans: For full-meal preparation
-
Frying pans: Perfect for cooked breakfasts
-
BBQ: Great for evening meals and group gatherings
-
Charcoal & lighter fluid: For BBQ users
-
Matches/lighters: Always handy to have spares
Utensils & Essentials
Bring a selection of utensils to cover all your cooking needs.
-
Spatulas, tongs, ladles, and serving spoons
-
Sharp knives and chopping boards
-
Plates, bowls, utensils, and cups
-
Tin foil, cling film, and food storage tubs
-
Dish soap, sponges, and tea towels
Cleaning & Waste Management
Keeping a clean camp is important for comfort, safety, and respecting the RIAT site.
-
Washing bowl: For dishes
-
Rubbish bags: Bring plenty
-
Hand sanitiser and wipes: Essential for quick clean-ups


These are some of the units we use in the kitchen area. You can find them in most major camping stores
A unique look
Making Your Camping Setup Unique & Full of Character
Once you’ve sorted the basics, it’s worth adding a few personal touches to your pitch. These little extras help make your campsite feel more inviting, easier to spot when you’re heading back in the evening, and add a bit of fun to your RIAT experience.
Solar Lights on Windbreaks
A simple string of solar lights around your windbreaks can make a big difference. They give your pitch a warm glow after dark, help you find your way back, and add a bit of atmosphere without using any extra power.
Flagpole and Lights
Plenty of campers bring a flagpole with a favourite flag or design. It’s a great way to make your pitch recognisable and add some personality. Adding a small light on or near the pole makes it easy to spot at night too.
Festival Kites
Festival-style kites are really popular at RIAT. When the wind picks up, they add colour and movement to the campsite and give your pitch a fun, lively feel. They’re a hit with both kids and adults.


Choosing the right Sleeping set up
Getting a Good Night’s Sleep
You can have the best-looking campsite at RIAT, but if you are sleeping badly every night, it can quickly take the shine off the trip.
Where possible, I prefer using a raised camping bed rather than sleeping directly on an airbed on the ground. Being slightly raised can help keep you away from the colder ground, makes getting in and out of bed much easier after a full day walking around the showground, and gives you some handy storage space underneath for bags, shoes and other camping gear.
Even in the middle of summer, I would still recommend taking a proper sleeping bag. RIAT can give you a warm, sunny afternoon followed by a surprisingly chilly night, so I normally bring an extra blanket or warm layer as well. It takes up very little space and you will be glad you packed it if the temperature drops.
You can find all sorts of camping beds, airbeds, sleeping bags, pillows and blankets from places such as GO Outdoors and Millets. However, you do not have to buy everything brand new.
If you are camping on a budget, it is well worth checking Vinted, eBay and Facebook Marketplace. Camping equipment is often used only a handful of times before being sold, so you can sometimes pick up some really good equipment for much less than buying new.
My advice would be to spend a little more attention on your sleeping setup than you think you need. After several long days at RIAT, a comfortable bed can be one of the best bits of camping gear you bring.
Food & Drink
Food, Cooking & Meal Prep at RIAT
Planning your food properly can make camping at RIAT much easier. We’ll cover simple cooking setups, food storage, meal ideas, where to buy your food and campsite options, helping you stay well fed without making things more complicated than they need to be.
For me, the biggest bit of advice is keep it simple. After spending most of the day walking around the showground, the last thing I normally want to do is come back to camp and start preparing a complicated meal.
Plan Before You Arrive
Before leaving home, I would roughly plan what you are going to eat each day. You don't need a military operation with every sausage accounted for, but having breakfast, lunch and evening meals roughly planned can save money and stop you buying far too much food.
If you're staying for most of the RIAT week, I wouldn't necessarily buy a week's worth of fresh food in one go either. I normally prefer taking enough for the first few days and then topping up during the week.
Think about what actually needs to be kept cold and how much room you have in your cool box.
Where Should You Buy Your Food?
My preference would be to do your main food shop before arriving at the campsite. It means you can arrive, set up your pitch and not immediately have to go back out looking for food.
If you need a quick top-up during your stay, Fairford itself currently has both a Co-op Food and Budgens. For a larger food shop, I would personally consider stopping somewhere such as Cirencester on the way in rather than relying entirely on the smaller shops around Fairford.
Some RIAT campsites also provide food, bars or small campsite shops. For example, Fairford Airshow Camping advertised camp stores selling items including milk, bread, drinks, snacks and camping essentials for its 2026 opening. Fairford Town Football Club also advertises hot food and bar facilities during its RIAT camping weekend.
I would still bring your main supplies with you. Treat campsite shops and catering as useful extras rather than relying on them for every meal, and always check what your chosen campsite is offering for your RIAT year before travelling.
What I Would Bring
You really don't need to cook restaurant-style meals at camp. I normally look for food that is quick, filling and doesn't create loads of washing-up.
-
Breakfast: bacon rolls, sausages, cereal, pastries, porridge or breakfast wraps
-
Lunch: sandwiches, wraps, sausage rolls, crisps, fruit and snacks
-
Dinner: burgers, hot dogs, pasta, chilli, curry, fajitas, BBQ food or simple one-pan meals
-
Late evening: noodles, soup, toasties or something quick after a long show day
-
Snacks: cereal bars, biscuits, fruit, sweets, nuts and crisps
-
Drinks: plenty of bottled water, squash, tea, coffee and soft drinks
One thing I have learnt is that you don't need a different complicated meal every night. Burgers one evening, pasta the next and a BBQ another night can be more than enough.
Breakfast Is Worth Planning
Breakfast is probably one of the meals I would plan properly.
A bacon or sausage roll at camp before heading towards the showground can set you up nicely for the morning, particularly if you're going to be walking around for several hours.
If you want an earlier start, keep something even easier available. Pastries, cereal bars, cereal or porridge can get everyone fed quickly without having to unpack the entire kitchen at 6am.
Prepare Some Food at Home
One little trick that can make camping much easier is doing some preparation before you leave.
You could cook chilli, curry or pasta sauce at home, portion it into containers and bring it with you chilled or frozen. You then only need to safely reheat it at camp and cook something simple such as rice or pasta alongside it.
For longer stays, frozen meals can also help keep your cool box cold during the first part of the trip while they slowly defrost.
Just remember that chilled food needs to be stored safely. The Food Standards Agency recommends keeping cold picnic food in a cool box or cool bag with ice or frozen gel packs, keeping it out of direct sunlight and limiting how often the lid is opened.
Your Cool Box Is Important
If you're bringing meat, milk, cheese or other chilled food, a decent cool box becomes one of the most useful pieces of equipment at camp.
I would use plenty of frozen ice packs and organise the box so you're not digging through everything every five minutes. Drinks can also take up a surprising amount of room, so for a larger group it can be worth having one cool box for food and another for drinks.
Keep your cool box somewhere shaded rather than sitting inside a hot tent or directly in the sun.
Keep Your Cooking Setup Simple
You don't need a full outdoor kitchen, although I personally like having a dedicated cooking area if I'm camping for the full week.
A small camping stove, cooking stand or table, frying pan, saucepan and basic utensils will cover most meals.
For larger groups, an event shelter works brilliantly as a kitchen and eating area. It keeps your cooking equipment together, gives you somewhere to prepare food and provides some protection if the Great British summer decides sunshine has had enough.
I would keep cooking equipment towards one side, food preparation in the middle and somewhere for plates, cups and supplies away from the stove.
Always follow your campsite's rules for stoves, BBQs and open flames.
BBQ Nights
A BBQ can be a great option during RIAT week, particularly if you're camping with friends or family.
Burgers, sausages, chicken, kebabs and vegetables are all easy campsite foods, but this is one area where I wouldn't rush things. Make sure meat is properly cooked and keep raw meat separate from ready-to-eat food. The Food Standards Agency advises cooking foods such as poultry, pork, sausages and burgers thoroughly before eating.
Also check the campsite's latest BBQ rules before travelling, particularly during very hot or dry weather.
Don't Forget Show Days
You also need to think about what you're eating inside RIAT, not just back at camp.
If I'm spending all day at the show, I would prepare sandwiches or wraps the night before or early that morning and take snacks and drinks with me.
You can then decide whether you want to buy something from the catering outlets during the day without being completely dependent on them.
It can also save quite a bit of money if you're attending multiple show days as a family.
Washing Up & Keeping Camp Clean
This is the boring part, but it makes a huge difference.
Bring washing-up liquid, sponges, tea towels, kitchen roll and plenty of bin bags. I also like having a separate rubbish bag near the kitchen area so wrappers and food waste don't start migrating around the pitch.
Try to wash cooking equipment reasonably soon after you've finished rather than leaving everything until the morning.
It makes your camp feel much more organised and means you're ready to start again the following day.
My Advice for a Full RIAT Week
If I was planning food for several days at RIAT, I would shop big, cook simple and top up when needed.
Bring enough food to get yourself comfortably through the first few days, keep a good supply of easy meals and snacks, and leave some flexibility to eat from your campsite's catering or grab something locally.
You don't need to bring half of Tesco with you.
A little bit of planning before you arrive means less wasted food, less time cooking and more time actually enjoying RIAT.
Weather
Over the years, we’ve been pretty lucky with the weather but let’s be real, rain can sneak up on us. To keep things comfy, make sure to waterproof your tent. I learned this the hard way back in 2023 when our tent started leaking because it had lost its waterproofing. So, when you’re shopping for a tent, look for one with waterproofing rated at 3,000 mm or more; 4,000 to 5,000 mm is even better!
Even if the forecast says it’s going to be sunny and warm, it’s smart to pack for those surprise rainy days. My crew always brings a mix of gear, from waterproof clothing and hiking boots to shorts, sliders, and T-shirts. Trust me, there have been days when I needed to use all of it, sometimes all in one day! Being ready for any kind of weather will help you enjoy your outdoor experience, no matter what Mother Nature throws at you.
In 2023 we has some really heavy down pours on the Friday. This was the result, causing carnage in campsites around RAF Fairford.


Showers & Toilets
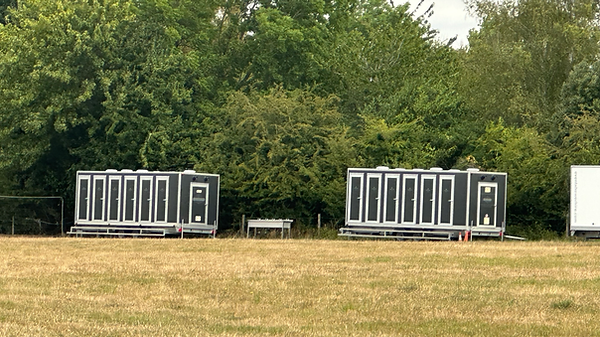
When camping at RIAT, Showers in campsites are provided, however its not your local premier inn. So remember campsites open for RIAT are generally working farms. So campsites hire portable showers and toilets. Below is what to expect in campsites. This was taken at Fairford Airshow Camping. They are both cleaned regularly.



Tent Location
Choosing the Right Spot for Your Tent
Picking the right place to pitch your tent is more important than it might seem, and a few simple choices can save you a lot of trouble.
Avoid setting up under tall trees.
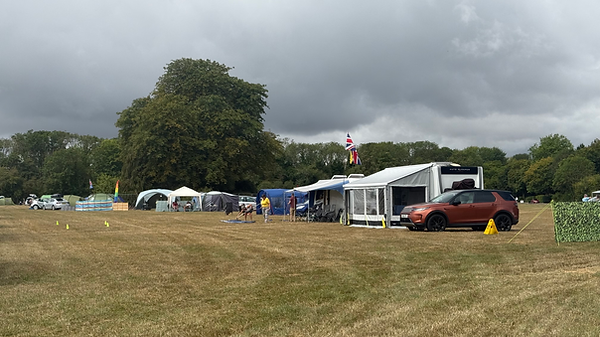
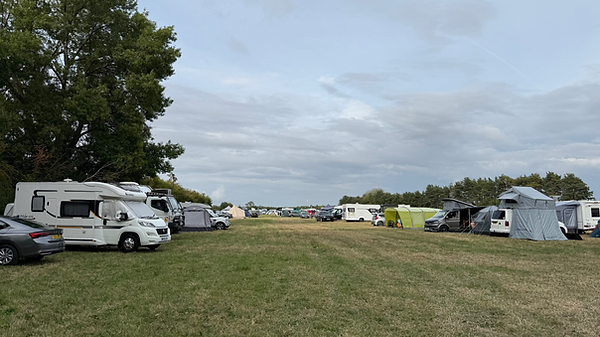
In 2023, the weather on the Friday was particularly rough. Heavy rain and strong winds rolled through RAF Fairford, and a large tree in the Rainbow Field at Townsend Farm came crashing down. It missed a tent by only a few metres. Thankfully no one was hurt, but it was a clear reminder of why it’s best to stay away from trees in bad weather.
Watch out for low ground.
When you’re putting up your tent, make sure it’s not at the bottom of a slope or in a dip. If it rains, water will naturally run downhill and can easily find its way underneath your tent, causing damp floors and other problems you don’t want during a long stay.
Plan space for your car.
Once your tent is up, take a moment to section off some space for parking. It might sound obvious, but it’s easy to forget, especially when you’re focused on getting camp set up. I’ve learned the hard way that if you don’t create a clear parking area, you can easily get boxed in by your neighbours. Using windbreaks to mark out a little “driveway” works really well and keeps everything organised.





Power & Lighting
RIAT camping fields can become very dark at night, and if you're staying for several days, having a reliable way to charge your equipment can make camping much easier.
You don't necessarily need a huge power setup. Think about what you actually need to charge and how long you're staying before spending hundreds of pounds on equipment.
Solar Power Stations
Portable power stations are a great option for longer RIAT camping trips. Brands such as Jackery, EcoFlow, BLUETTI and Anker offer different-sized units that can be paired with portable solar panels.
They can be useful for charging:
-
Phones
-
Camera batteries
-
Tablets
-
Rechargeable camping lights
-
USB fans
-
Power banks
-
Other small electrical devices
-
For a smaller setup, Jackery offers the Explorer 100 Plus, with a 99Wh battery and 128W output. It is also available with a compact 40W SolarSaga Mini solar panel, making it a useful option if you mainly want to keep phones, lights and smaller devices topped up around camp.
For several days at RIAT, something around the 240Wh to 300Wh range gives you more flexibility. If you're camping for the full week, travelling as a family or charging several devices, I would consider something around 500Wh or larger.
Remember that electric kettles, heaters and cooking appliances can require a lot of power, so always check the output of your power station before plugging anything in.
Rechargeable Camping Lights
I would definitely bring a couple of rechargeable camping lights.
A hanging light inside your tent or event shelter works brilliantly over the kitchen or seating area, while smaller lanterns can be placed around your pitch.
It keeps everything well lit without having extension cables running around the campsite.
Power Banks
If you're camping on a budget, you don't have to buy a solar generator.
A few fully charged power banks can be more than enough for a shorter stay, particularly if you only need to charge:
-
Phones
-
Smartwatches
-
Earbuds
-
USB camping lights
-
Small electronic devices
I would take at least one extra power bank and keep it charged as a backup.
My Advice
For most people, I wouldn't immediately jump to the biggest power station available.
Weekend at RIAT? A few power banks may be enough.
Light camper? Something like the Jackery 100 Plus and a small solar panel could work well.
Several days? I would look around the 240Wh–300Wh range.
Full week or family setup? This is where I would start considering 500Wh or more.
Work out what you actually need to charge first, then choose your power setup around that. It can save you quite a bit of money and stop you bringing a small power station the size of a suitcase when all you wanted was somewhere to charge your phone.
Allow time for Packing and Traveling
One of the most important camping tips is to give yourself plenty of time for both packing and travelling to your destination. Rushing only leads to forgotten gear and unnecessary stress, so it’s worth creating a checklist a few days, if not weeks, before you leave. Work through it methodically to make sure nothing essential gets left behind.
It’s also a good idea to keep an eye on the weather forecast. Knowing what conditions to expect can help you avoid setting up in the rain and lets you prepare properly for heat, wind, or cooler evenings.
If you can, try to arrive early. Having daylight makes setting up your tent much easier, and getting there before the hottest part of the day is a huge bonus, pitching a tent in the heat is nobody’s idea of fun. A relaxed, well-timed arrival sets the tone for a smooth and enjoyable start to your RIAT camping experience.
Tools and Spares
A few basic tools and spare parts can save a lot of hassle at your campsite. I would recommend keeping everything together in a separate repair or tool bag, so you know exactly where it is when something breaks, bends or comes loose.
Useful items to pack include:
-
Spare tent pegs
-
Heavy-duty pegs for softer ground
-
Tent repair patches
-
Spare guy lines
-
Spare clips and buckles
-
Tent pole repair sleeve
-
Rubber or camping mallet
-
Cable ties
-
Gaffer or duct tape
-
Electrical tape
-
Multi-tool
-
Small screwdriver set
-
Pliers
-
Adjustable spanner
-
Scissors
-
Strong cord or paracord
-
Spare batteries
-
Torch or head torch
-
Spare bungee cords
-
Small sewing kit
-
Waterproof repair tape
-
Superglue
-
Work gloves
You probably won't use most of it, but when a tent peg bends, a guy line snaps or something comes loose after a windy night, having a small repair bag ready can make life much easier.
I keep this separate from the main camping equipment so it doesn't disappear underneath chairs, bedding and food when I actually need it.

Follow the Rules of your Campsite
Camping at RIAT can be an amazing experience, but it’s important to follow your campsite’s rules to keep things safe and enjoyable for everyone. These guidelines aren’t there to restrict you, they’re there to ensure the site runs smoothly and that everyone gets the most out of their stay.
Respect quiet hours:
Most campsites have designated quiet times, usually late at night and early in the morning. Keep music low, avoid loud conversations, and be mindful of people who may be resting between long show days. A little consideration goes a long way.
Keep your pitch tidy:
With so many people camping at RIAT, space is valuable. Keeping your area clean and organised not only helps you find your gear more easily but also reduces trip hazards. Plus, a tidy pitch makes the site look better for everyone.
Follow fire regulations:
Safety is key, especially with tents, fuel, and cooking equipment around. Only use barbecues or stoves in the areas allowed by the campsite, never leave them unattended, and make sure they’re fully extinguished before you head out or go to sleep.
Stay within your designated area:
Campsites at RIAT can get very busy, and pitches are laid out carefully to fit everyone in. Make sure your tent, car, and any awnings or windbreaks stay inside your allocated space so you’re not encroaching on someone else’s.
