

How to Edit Aviation Photographs
Why do we Edit?
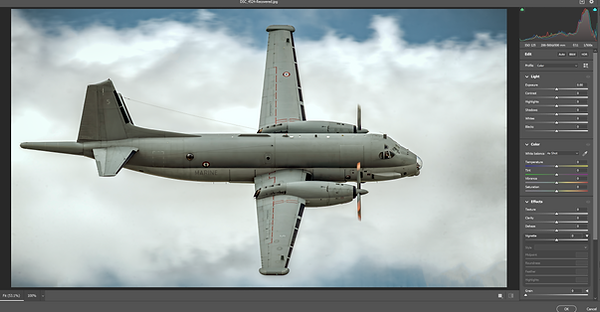
Editing aviation photography in Any Photography editing software including, Lightroom, Photoshop, or the new kid on the block, DXO, which I still need to try, are all fantastic ways to create the images you want. It just needs a little practice and patience, once you have both, is where your images really take off. Whether you're fixing exposure, enhancing details or removing dust spots, here’s a detailed, step-by-step guide tailored for air show shots like those from RIAT.
Remember, each photo is different and each photo tells a story, why you took it, how, and the equipment it took.
Editing does not have to be complicated. This guide explains the main Lightroom controls in basic photography language, helping you understand what each slider changes and when you may want to use it.
There are no perfect settings that work for every photograph. The aircraft, lighting, weather and background will all affect the edit. Use these controls as a starting point and adjust them to suit your photograph and personal style.
We have also created a FREE printable PDF and detailed Step by Step guide to editing your aviation images buy using Lightroom, however this will work using Photoshop, another editing software.

How to Edit Aviation Photographs in Lightroom and Photoshop
Editing aviation photographs can feel confusing when you first open Lightroom, Camera Raw or Photoshop. There are lots of sliders and tools, but you do not need to use every one on every image.
This guide explains the main editing controls in simple photography language. It is designed for photographers with little or no editing experience who want to improve photographs taken at RIAT or other aviation events.
Every photograph is different. The aircraft, weather, lighting and background will affect the adjustments you need to make. Use the information below as a starting point, move the sliders gently and aim to keep your aircraft looking natural.
Quick Navigation
-
Basic Panel
-
Tone Curve
-
HSL and Colour
-
Colour Mixer
-
Detail
-
Lens Corrections
-
Transform
-
Effects
-
Calibration
-
Editing Tools
-
Simple Editing Workflow
-
Photoshop Editing
-
Export Settings
-
Quick Final Checklist
-
Download the Cheat Sheet
Understanding Lightroom and Camera Raw
Lightroom and Adobe Camera Raw contain many of the same editing controls. If you open a RAW photograph in Photoshop, it will normally open in Camera Raw first.
This means you can follow most of the Lightroom sections below when using Camera Raw. You can then open the photograph in Photoshop if it needs more detailed work, such as removing distracting objects.
You can also edit JPEG images, but RAW files contain more image information. This gives you more freedom to recover bright skies, lift dark shadows and correct the colours
.
JACK’S QUICK TIP: You do not have to use Photoshop for every image. Many aviation photographs can be completed entirely in Lightroom or Camera Raw.
1. Import and Organise Your Photographs
Before editing, create a simple system for organising your images.
Import your photographs
Import the photographs from your memory card into Lightroom or save them into clearly named folders before opening them in Photoshop.
For example:
-
RIAT 2027 – Friday
-
RIAT 2027 – Saturday
-
RIAT 2027 – Sunday
-
RIAT 2027 – Arrivals
-
RIAT 2027 – Departures
-
RIAT 2027 – Static Aircraft
Use ratings and flags
You do not need to edit every photograph you take. Use flags, star ratings or colour labels to identify your strongest images.
Check for:
-
A sharp aircraft
-
A good background
-
Correct focus
-
Interesting light
-
Propeller movement
-
Display smoke
-
A strong composition
Delete only the images you are certain you do not need. A photograph that initially looks too bright or dark may still contain recoverable detail if it was taken in RAW.
Add keywords
Keywords make photographs easier to find later. You could include:
-
Aircraft type ( F-15 Strike Eagle)
-
Display team (Black Eagles)
-
Registration (XH558)
-
Airshow name RIAT 2027
-
Year 2027
-
Arrivals ( Wednesday, Runway 27, Park & View East)
-
Departures Monday, Runway 09, Park & View West)
-
Flying display ( Friday using Nikon Z9, Cannon, 7D)
-
Static display (Sunday Walk Around)
2. Crop and Straighten
Cropping is a good place to begin because it helps you decide how the finished photograph will look. 99% of the time, I crop to 16:9, this keeps all my images looking even, and in a landscape look. This keep your images looking uniformed, when published online.
Crop Tool
The Crop Tool changes the composition and removes unwanted space around the aircraft.
When cropping, think about:
-
Where the aircraft is travelling
-
The position of the smoke trail
-
Distracting objects near the edges
-
Whether the horizon is level
-
Whether the aircraft has enough room around it
For a head-on aircraft, placing it in the centre can create a strong, symmetrical composition.
Aspect ratio
You can keep the camera’s original aspect ratio or select another size, such as:
-
3:2: A common camera and print format
-
4:5: Useful for Instagram portrait posts
-
1:1: A square photograph
-
16:9: A wide, cinematic appearance
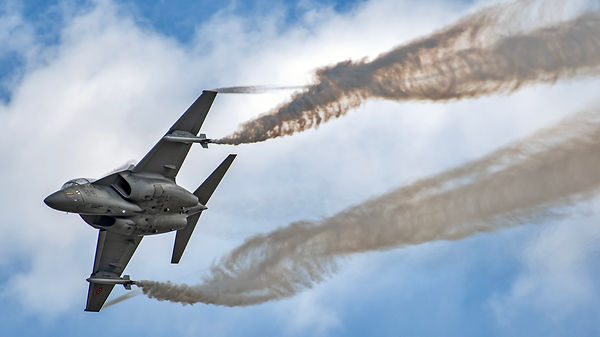
I often use 16:9 for my photographs, but this is a personal preference, As seen above. Choose the crop that works best for the aircraft and the final place where the image will be displayed.
Straighten
Use the Straighten Tool to level:
-
Runways
-
Horizons
-
Hangars
-
Crowdline barriers
-
Buildings
JACK’S QUICK TIP: Before cropping tightly, check that you are not cutting off part of a wing, smoke trail or rotor blade by accident.
3. Lens Corrections
Lens corrections can fix common problems caused by the camera lens. It is usually worth checking these controls near the beginning of your edit.
Remove Chromatic Aberration
Chromatic aberration can appear as purple, green or coloured edges around the aircraft, particularly where a dark aircraft meets a bright sky.
Enabling this option can reduce those unwanted coloured outlines.
Enable Profile Corrections
Lightroom and Camera Raw can recognise many camera lenses and automatically correct:
-
Lens distortion
-
Dark corners
-
Uneven brightness
-
Some wide-angle stretching
This can be especially helpful with photographs of static aircraft taken using a wide-angle lens.
Manual Corrections
Use the manual controls when the automatic lens profile does not completely correct the problem. These controls allow you to adjust distortion, colour fringing and lens vignetting yourself.
JACK’S QUICK TIP: Lens corrections can slightly change the crop. Enable them before spending too much time carefully positioning the aircraft.
4. Basic Panel
The Basic Panel is where most of your main adjustments will be made. If you are shooting in RAW, then these settings will automatically open up, in Camera RAW. You may not need to use every slider, however, this is a form of art, use the sliders, to edit in your style, but don't over use them to create a fake looking image.
White Balance
White Balance corrects a photograph that looks too warm, cool, green or purple.
-
Move Temperature towards blue to make the photograph cooler.
-
Move it towards yellow to make the photograph warmer.
-
Move Tint towards green or magenta to correct an unwanted colour cast.
You can also use the White Balance Eyedropper and click on a neutral grey or white area. However, clouds and display smoke are not always completely neutral, so check the result carefully.
White Balance still applies when shooting RAW. In fact, RAW gives you more freedom to change it after taking the photograph without damaging the image as quickly as a JPEG.
Try to keep the sky believable and the aircraft paint close to its real colour.
Exposure
Exposure makes the entire photograph brighter or darker.
-
Move right to brighten the image.
-
Move left to darken it.
Watch the aircraft and sky while making this adjustment. Increasing Exposure too far may remove detail from bright clouds or reflective aircraft surfaces.
Contrast
Contrast changes the difference between the bright and dark areas.
-
Move right for a stronger and more dramatic image.
-
Move left for a softer and flatter appearance.
Too much contrast can remove details from dark aircraft or produce unnaturally bright highlights.
Highlights
Highlights control the brightest areas of the photograph.
Move the slider left to recover detail from:
-
Bright clouds
-
Aircraft reflections
-
White paint
-
Display smoke
-
Sunlit metal
Increasing Highlights can make bright areas stronger, but use this carefully.
Shadows
Shadows control darker areas without changing the brightest parts as much.
Move the slider right to reveal details under:
-
Wings
-
Fuselages
-
Cockpits
-
Undercarriages
Lifting the Shadows too far can introduce noise and make the image look flat.
Whites
Whites control the brightest white point in the photograph. Increasing them can add brightness and energy, while reducing them may recover some bright detail.
Blacks
Blacks control the darkest point. Moving the slider left can add depth, while moving it right can reveal more dark detail.
Texture
Texture increases or reduces fine surface details.
It can help bring out:
-
Rivets
-
Panel lines
-
Aircraft markings
-
Surface details
Too much Texture can make the aircraft and background look harsh.
Clarity
Clarity adds contrast around larger details and edges. It can make an aircraft look stronger and more defined.
Avoid pushing it too far because it can create dark outlines and an unnatural appearance.
Dehaze
Dehaze can improve definition in a photograph affected by light haze, moisture or low contrast.
A small increase can strengthen the sky and aircraft. Too much can create strange colours, heavy shadows and an unrealistic sky.
Dehaze cannot fully repair severe heat distortion. If the aircraft details have been physically distorted by hot air, the lost detail may not be recoverable.
Vibrance
Vibrance strengthens the weaker colours while protecting colours that are already strong. It is normally a gentler place to begin than Saturation.
Saturation
Saturation changes the strength of every colour in the photograph.
Increasing it too far can make aircraft paint, grass and blue skies look unrealistic or cartoon-like.
JACK’S QUICK TIP: Start gently. Small adjustments normally produce a more natural result than moving every slider a long way.
5. Tone Curve Panel
The Tone Curve provides more detailed control over brightness and contrast.
You do not have to use it when starting out. If your photograph already looks good after the Basic Panel, you can leave it alone.
Parametric Curve
The Parametric Curve separates the photograph into:
-
Highlights
-
Lights
-
Darks
-
Shadows
This allows you to adjust one brightness range without changing everything equally.
Point Curve
The Point Curve lets you place adjustment points directly onto the curve.
A gentle S-shaped curve can add contrast:
-
Raise the brighter part slightly.
-
Lower the darker part slightly.
Keep the curve subtle. A strong curve can quickly remove highlight and shadow detail.
RGB Channels
The Red, Green and Blue channels allow you to adjust colour within different brightness areas. These controls are more advanced and are often used for creative colour grading.
JACK’S QUICK TIP: If you are new to editing, begin with the Basic Panel. Try the Tone Curve when you feel more confident and want greater control.
6. HSL and Colour
HSL stands for Hue, Saturation and Luminance. It allows you to adjust individual colours instead of changing the entire photograph.
Hue
Hue changes one colour into a slightly different shade.
For example, you can adjust a blue sky that appears slightly purple or change the appearance of green grass.
Saturation
Saturation controls how strong one selected colour appears.
This can help reduce an overpowering blue sky without affecting the colours of the aircraft.
Luminance
Luminance makes an individual colour brighter or darker.
You can use it to:
-
Darken a blue sky
-
Brighten aircraft markings
-
Reduce bright grass
-
Adjust display smoke
Be careful when darkening a blue sky because it may reveal noise, uneven patches or dust spots.
7. Colour Mixer and Point Colour
The Colour Mixer gives you more precise control over the colours in your photograph.
Select a colour and adjust its:
-
Hue
-
Saturation
-
Luminance
The targeted adjustment tool allows you to click and drag directly on a colour in the image.
Point Colour
Point Colour lets you select a more precise colour range. This can help when adjusting:
-
Aircraft paint
-
Display smoke
-
Blue skies
-
Grass
-
Warning markings
-
Navigation lights
Check that your adjustment has not accidentally changed another part of the photograph containing the same colour.
JACK’S QUICK TIP: Aircraft colours should still look believable. If you know the real paint is grey, avoid editing it until it looks blue or silver.
8. Detail Panel
The Detail Panel controls sharpening and noise reduction. Zoom into the photograph at 100% before making these adjustments. You will find these in the camera RAW section. This will help you create and give your images more detail.
Sharpening Amount
Amount controls the overall strength of the sharpening.
A starting value of around 40 can work for some images, but it is not a fixed setting. The camera, lens, ISO and original sharpness will all affect the amount required.
Radius
Radius controls the width of the edges being sharpened. A value around 1.0 can be a useful starting point.
Detail
Detail controls how much fine surface information receives sharpening. Higher settings can reveal more detail, but may also increase noise.
Masking
Masking restricts sharpening mainly to stronger edges.
Hold Alt on Windows or Option on a Mac while moving the slider:
-
White areas receive sharpening.
-
Black areas are protected.
This is particularly helpful for keeping noise out of a smooth sky.
Noise Reduction
Noise can appear as grain or coloured speckles, especially when using a high ISO or lifting dark shadows.
Luminance
Reduces brightness noise and grain. Too much can remove aircraft details and create a smooth, plastic appearance.
Detail
Controls how much fine detail is protected while luminance noise is reduced.
Contrast
Helps retain contrast within smaller details after noise reduction.
Colour
Removes coloured speckles. Lightroom normally applies a small amount automatically.
Smoothness
Blends uneven patches of colour noise.
JACK’S QUICK TIP: Sharpening cannot rescue a badly out-of-focus photograph. It is designed to improve detail that is already present.
9. Transform Panel
The Transform Panel is particularly useful for static aircraft, buildings and hangars.
Vertical
Corrects lines leaning backwards or forwards.
Horizontal
Corrects lines leaning towards one side.
Rotate
Rotates the entire photograph to correct a tilted horizon.
Aspect
Changes how wide or narrow the photograph appears.
Scale
Makes the image larger or smaller inside the frame.
X Offset
Moves the image left or right.
Y Offset
Moves the image up or down.
Automatic Upright options may correct the photograph for you, but always check the result. Automatic adjustments can sometimes stretch the aircraft or crop important parts of the frame.
10. Effects Panel
Post-Crop Vignette
A vignette darkens or brightens the edges of the photograph.
A slight dark vignette can guide attention towards the aircraft, but it should be subtle. If the viewer notices the dark corners before the aircraft, it is probably too strong.
Grain
Grain adds a film-like texture. It is mainly a creative effect and is not normally needed for a clean aviation photograph.
Do not confuse added Grain with unwanted digital noise.
11. Calibration Panel
Calibration provides more advanced control over how colours are created throughout the photograph.
Shadows Tint
Adds green or magenta to the shadow areas.
Red Primary
Changes the hue and saturation of colours connected to the red channel.
Green Primary
Changes the hue and saturation of colours connected to the green channel.
Blue Primary
Changes the hue and saturation of colours connected to the blue channel.
Calibration can change several colours at the same time, so use small adjustments. It is normally used near the end of an edit and is not essential for beginners.
12. Local Editing and Masking Tools
Global adjustments affect the entire photograph. Masks allow you to edit one selected area.
Subject Mask
Lightroom can automatically select the aircraft. You can then brighten, sharpen or adjust it without changing the entire sky.
Check carefully around wings, aerials, propellers and landing gear because the automatic selection may miss small areas.
Sky Mask
The Sky Mask selects the sky, allowing you to adjust its exposure, colour or Dehaze separately.
Avoid making the sky much darker than the light on the aircraft, as the two should still look as though they belong together.
Background Mask
This can select the area behind the aircraft. It may be useful when the aircraft needs to stand out slightly more from a busy background.
Adjustment Brush
The Brush allows you to paint an adjustment onto a selected area manually.
It can be used to:
-
Brighten a cockpit
-
Recover detail under a wing
-
Reduce a distracting bright patch
-
Add detail to one area
-
Linear Gradient
Previously called the Graduated Filter, this applies an adjustment gradually across the image. It can be useful for balancing an overly bright sky.
Radial Gradient
Previously called the Radial Filter, this creates an oval-shaped adjustment around or inside a selected area.
Spot Removal or Healing Tool
Use this to remove:
-
Sensor dust
-
Small marks
-
Minor distractions
-
Small objects in the sky
JACK’S QUICK TIP: When using masks, zoom in and check the edges. Poorly selected areas can create bright outlines around the aircraft.
13. Advanced Editing in Photoshop
Photoshop is useful when an image needs more detailed work than Lightroom or Camera Raw can provide.
Open the photograph in Photoshop
Complete your main RAW adjustments first. Then open the image in Photoshop for detailed corrections.
Remove small distractions
The Remove Tool, Spot Healing Brush and Healing Brush can help remove:
-
Sensor dust
-
Small cones
-
Ropes
-
Litter
-
Small people in the distance
-
Minor background distractions
Work on a new empty layer where possible. This keeps the original image underneath and makes it easier to correct mistakes.
Remove larger objects
Generative Fill, Content-Aware Fill or the Clone Stamp can remove larger distractions, but examine the result carefully. These tools may create repeated patterns, damaged aircraft edges or unrealistic backgrounds.
Removing large crowds, barriers or objects crossing the aircraft can take considerable time and may not always look natural.
Heat haze
Photoshop may improve contrast or reduce the appearance of mild haze, but it cannot reliably restore detail that severe heat distortion has removed.
If the aircraft shape and markings are badly distorted, it may be better to select a different frame from your burst.
Composites
A composite combines parts from different photographs, such as placing an aircraft against another sky.
This is a creative form of editing rather than a normal photographic correction. If you create a composite, it is good practice to make it clear that the finished image has been heavily edited
.
Final Photoshop check
Before saving, zoom in and check:
-
Aircraft edges
-
Wing tips
-
Propellers and rotors
-
Smoke trails
-
Repeated cloned patterns
-
Sensor spots
-
Halos around the aircraft
14. A Simple Editing Workflow
If you are unsure where to begin, follow this order:
-
Import and organise your photographs.
-
Select the strongest image from each sequence.
-
Crop and straighten the photograph.
-
Enable lens corrections.
-
Correct the White Balance.
-
Adjust Exposure.
-
Recover Highlights and lift Shadows if needed.
-
Set Whites and Blacks.
-
Add a small amount of Texture, Clarity or Dehaze.
-
Adjust individual colours using HSL or the Colour Mixer.
-
Apply sharpening and noise reduction.
-
Use masks for the aircraft, sky or background.
-
Open the photograph in Photoshop if it needs more detailed work.
-
Check the full photograph for mistakes.
-
Export a finished copy.
You do not have to complete every step. If the photograph already looks right, leave it alone.
15. Final Touches and Export
Export for websites and social media
These settings provide a useful starting point:
-
File format: JPEG
-
Colour space: sRGB
-
Quality: 80–100
-
Image size: 2048 pixels on the long edge
-
Output sharpening: Sharpen for Screen
-
Metadata: Include your copyright information if required
Different websites may resize or compress photographs, so keep a separate full-resolution copy.
Export for printing
Print settings depend on the required print size and the company producing it. Export a full-resolution image unless the printer asks for something different.
Do not enlarge a small crop too far because this can reduce quality.
Save your main edit
Keep your original RAW file and save a high-quality finished version. Avoid repeatedly editing and saving the same JPEG because its quality may gradually reduce.
Pro Tips for Aviation Photography Editing
-
Shoot in RAW when possible to retain more editing information.
-
Protect bright skies and reflective aircraft surfaces when taking the photograph.
-
Use presets as starting points, not as a one-click answer.
-
Check aircraft paint and markings remain believable.
-
Avoid excessive Dehaze, Clarity and sharpening.
-
Do not lift dark shadows so far that they become noisy and grey.
-
Check blue skies for sensor dust.
-
Compare your edit with the original photograph.
-
Take a short break and look at the image again with fresh eyes.
-
Remember that your personal style may develop as you gain experience.
Quick Final Checklist
Before exporting, ask yourself:
-
Is the aircraft sharp?
-
Is the horizon straight?
-
Does the crop give the aircraft enough space?
-
Are the highlights controlled?
-
Can I see enough shadow detail?
-
Does the sky look natural?
-
Are the aircraft colours believable?
-
Is there too much noise reduction?
-
Have I added too much sharpening or Clarity?
-
Are there any sensor spots?
-
Do the masks have clean edges?
-
Does the edited photograph still look realistic?
JACK’S FINAL QUICK TIP: Editing is personal, and there is no single perfect way to finish every photograph. Use these controls to understand what is possible, then develop a style that suits your own images.